Allowing Access
Before the SAFE Billing Platform can access your Stripe data, you must grant permission. This is done by setting up an API key with the appropriate permissions within your Stripe dashboard and entering this into the platform. Depending upon your level of permissions within Stripe and the platform, you may require assistance from someone with higher levels of access. Stripe provides a testing environment alongside the live environment, please ensure that you are accessing the correct area when generating keys.
Note
Please note that the screenshots below were taken of the test mode within the Stripe dashboard. The instructions below are for setting up access to the test environment. Once testing is complete, the process can be repeated on the live environments. The links to Stripe below are also to the test environment, you may access the live environment by using the Test mode toggle in the top right. API keys generated by Stripe clearly show if they are for the test or live environment.
Connecting Your Account
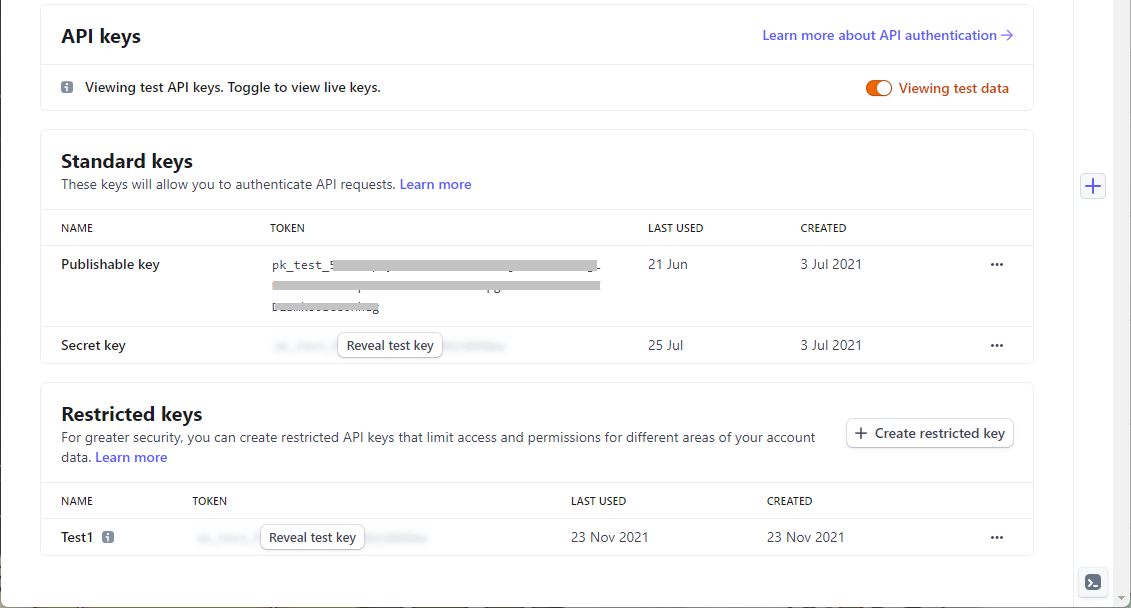
Log in to your Stripe dashboard, and ensure you are using the correct test/live environment. You will need to access the API keys, accessible through the Developers link in the bottom left, then the API keys section. Any existing keys will be shown. You will need to supply the Publishable Key and a restricted key. A new restricted key should be created for the SAFE Billing Platform, allowing access to only the required permissions.
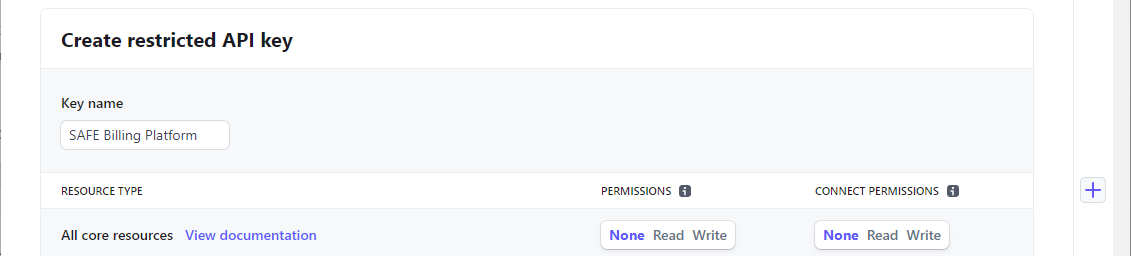
Click the + Create restricted key button. When asked how the key will be used, select Providing this key to another website. Enter a name for the new key, and enter https://www.billingplatform.uk (SAFE Billing Platform) in the URL field.
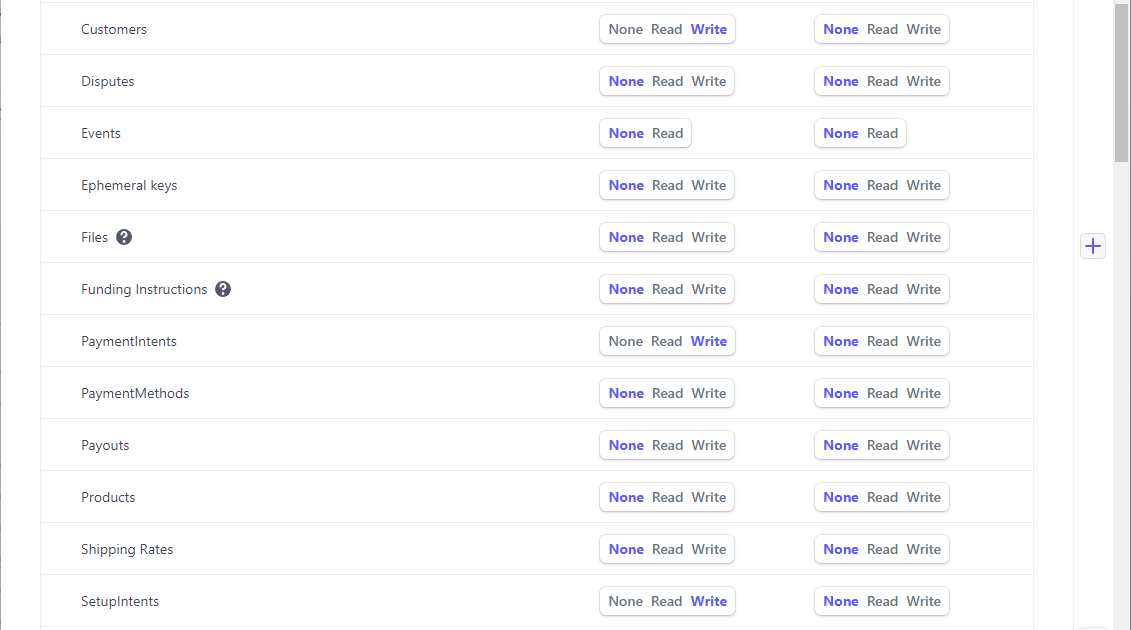
The default permissions are fine for the SAFE Billing Platform. If you want to fine-tune them, check Customise permissions for this key. The platform needs at minimum:
- Customers — Write
- PaymentIntents — Write
- PaymentMethods — Read
- SetupIntents — Write
- Webhook Endpoints — Write
Once you are happy with the settings, push the Create key button.
Once you have your keys, enter them in the platform. Go to Stripe (Card Payments) > API Keys in the main menu. This page requires admin-level access.
The publishable key begins with “pk_test_” or “pk_live_”. The restricted key begins with “rk_test_” or “rk_live_”. You will need to click Reveal key in Stripe to copy the restricted key. Treat this key as a password: do not send it by email.
Keys for the test environment should be entered in the Test fields. Once testing is complete, repeat the process with live keys.
Setup Complete
Once testing is complete and the live API keys have been added to the platform, the setup is complete, and you may begin collecting payments from your customers using their cards.